Your vehicle's paint plays a huge role in its overall look and value. Over time, elements like sun, rain, and road debris can cause paint imperfections. These can include scratches, swirl marks, and oxidation. That's where paint correction comes in. Paint correction is a detailed process that aims to remove surface imperfections, leaving your car looking brand new.
Paint correction is more than just a regular wash and wax job. It's a meticulous process that involves using specific tools and products to restore your vehicle's finish. For many car owners, understanding these techniques can be a game-changer. Effective paint correction can breathe new life into an old, worn-out paint job.
In this guide, we'll dive into the importance of paint correction, the essential tools required, the steps involved, and how to care for your vehicle post-correction. By learning these techniques, you can maintain the beauty and value of your car for years. Paint correction is an investment in your vehicle's future, ensuring it looks its best each time you hit the road.
Understanding Paint Correction and Its Importance
Paint correction is a process that removes imperfections from a vehicle's paintwork. These imperfections can include scratches, swirl marks, oxidation, and water spots. The goal of paint correction is to restore the paint to its original, flawless state. This process is crucial for car owners who want their vehicles to look their best and preserve their value.
The importance of paint correction cannot be overstated. A well-executed paint correction enhances the vehicle’s appearance, making it look brand new. This is especially important for those who take pride in their car's looks or are preparing to sell their vehicle. Clean, flawless paintwork can significantly boost a car's resale value.
Moreover, paint correction goes beyond aesthetics. It also protects the vehicle's exterior from further damage. By removing contaminants and imperfections, you reduce the risk of more serious paint damage over time. This makes paint correction a valuable investment in the long-term health of your vehicle.
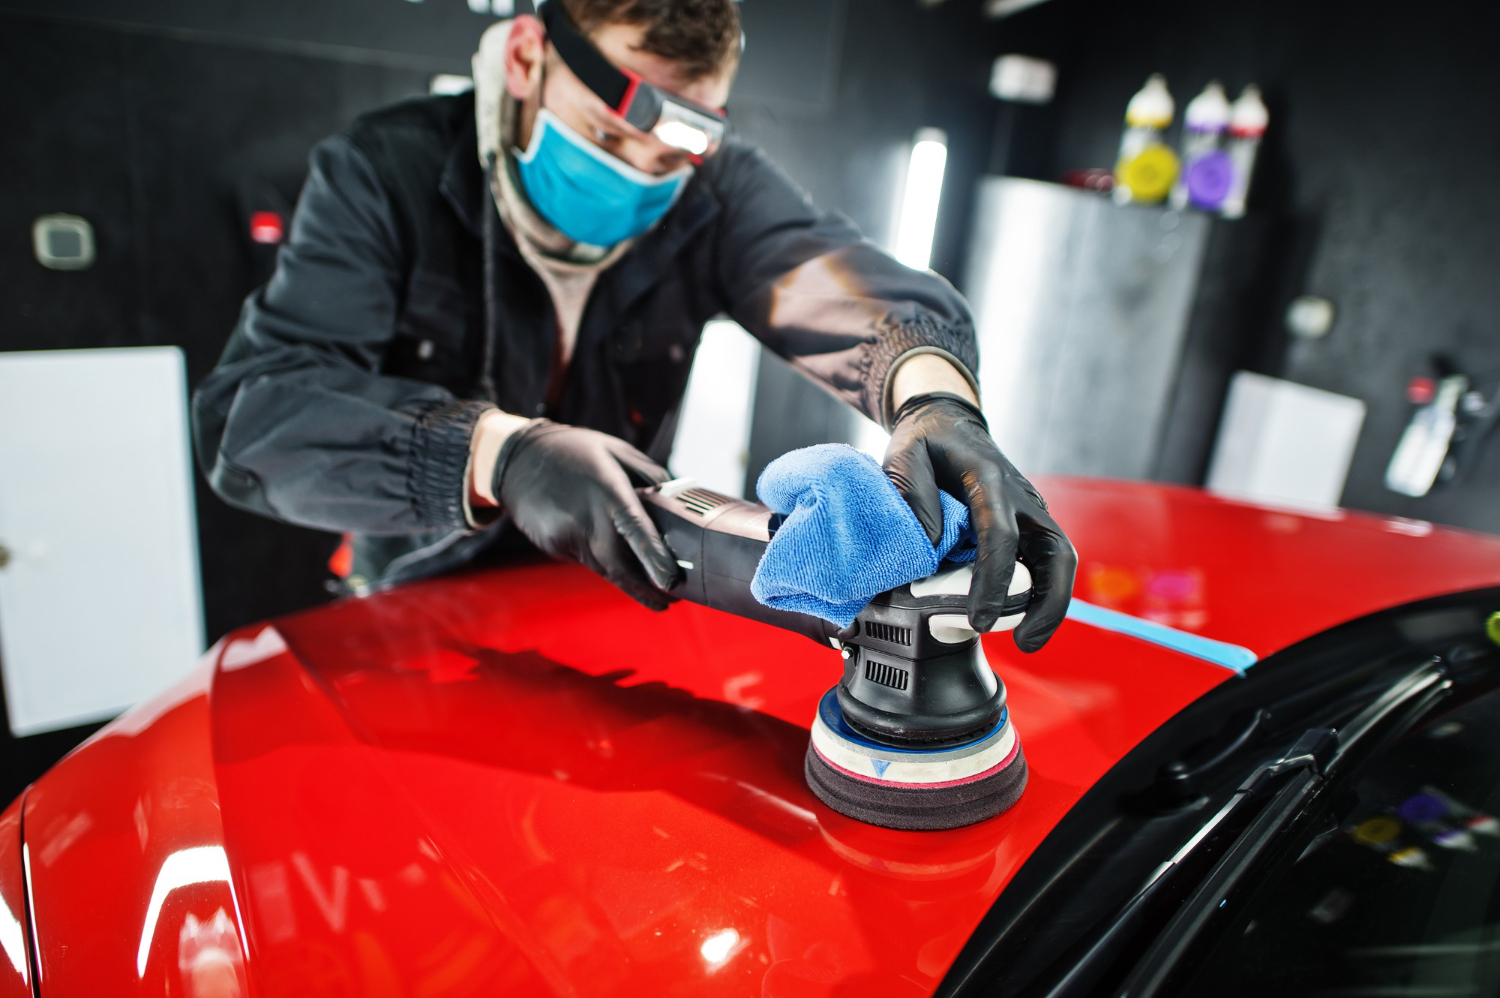
Essential Tools and Products for Paint Correction
To perform paint correction effectively, you need the right tools and products. Having the appropriate equipment ensures that you achieve the best results without causing additional damage to your vehicle's paint. Here are some essential tools and products for paint correction:
1. Dual-Action Polisher: This tool is essential for applying compounds and polishes evenly. It reduces the risk of burning the paint, which can happen with a rotary polisher.
2. Polishing Pads: Different colors and types of pads are used for various stages of correction. Foam pads are gentle and ideal for finishing, while microfiber pads are tougher and good for substantial corrections.
3. Compound and Polish: These products work together to remove imperfections from the paint. Compounds are abrasive and used first to eliminate deep scratches, while polishes refine the surface to a smooth finish.
4. Clay Bar: Before you start with polishing, a clay bar is used to remove surface contaminants that washing alone can’t eliminate. This step ensures a clean slate for effective correction.
5. Microfiber Towels: High-quality microfiber towels are crucial for wiping off residue without scratching the paint. They are extremely soft and absorbent.
6. Detailing Spray: Used for lubrication during the clay bar process, detailing sprays help to prevent scratching and ensure smooth application.
Using these tools and products correctly is essential for achieving professional-grade paint correction. They help remove imperfections and restore the shine and clarity of the vehicle's paint. Having the right equipment saves time and ensures your work is effective and safe for the car’s surface.
Step-by-Step Paint Correction Process
Completing a successful paint correction requires following a detailed process. Each step is crucial for achieving a smooth, flawless finish on your vehicle’s paint. Here is a step-by-step guide:
1. Wash the Car Thoroughly: Begin with a comprehensive wash to remove all dirt and grime. Use a pH-neutral car shampoo to avoid stripping any wax or sealant already on the vehicle.
2. Clay Bar Treatment: Use a clay bar with detailing spray to remove surface contaminants that washing alone cannot eliminate. This prepares the paint for correction by providing a clean surface.
3. Paint Inspection: Carefully inspect the paint under good lighting to identify scratches, swirls, and other imperfections. This helps in choosing the right compounds and pads for the job.
4. Polish and Compound Application: Start with the least abrasive compound and pad combination. Use a dual-action polisher to apply the compound in small sections. Work in overlapping passes to ensure even coverage. Move to a more abrasive combination if deeper scratches are present.
5. Refining the Surface: After correcting the imperfections, use a finishing polish and a softer pad to refine the surface. This step enhances the shine and clarity of the paint.
6. Wipe Off Residue: Use a clean microfiber towel to wipe off any polish or compound residue. Ensure no product remains on the surface, as it can affect the final result.
7. Seal and Protect: Apply a paint sealant or ceramic coating to protect the corrected paint. This step locks in the shine and provides a layer of protection against future damage.
Following these steps diligently ensures that your paint correction process is thorough and effective, resulting in a showroom-quality finish.
Post-Correction Care and Maintenance Tips
Once you have completed the paint correction process, taking proper care of your vehicle’s paint is crucial. Following a consistent maintenance routine helps in preserving the results and extending the longevity of your paintwork.
- Regular Washing: Wash your car regularly using a pH-neutral car shampoo. This helps in removing surface dirt and contaminants without harming the paint. Avoid using harsh detergents that can strip off the sealant or coating.
- Avoid Automatic Car Washes: Automatic car washes can cause scratches and swirls due to their abrasive brushes. Opt for a hand wash or a touchless wash to maintain the integrity of your corrected paint.
- Use Quality Microfiber Towels: When drying your car or wiping down the surface, use high-quality microfiber towels. They are gentle on the paint and help in avoiding scratches and swirl marks.
- Apply Maintenance Spray: Use a detail spray or a maintenance spray designed for ceramic coatings to boost the shine and hydrophobic properties of the paint sealant or coating.
- Park in a Covered Area: Whenever possible, park your car in a garage or under a covered area. This protects the paint from harmful UV rays, bird droppings, and other environmental pollutants.
Following these tips helps in maintaining the shine and protection provided by the paint correction, ensuring your vehicle looks pristine for a longer period.
Conclusion
Investing in paint correction is a smart decision for maintaining your vehicle’s appearance and value. By understanding the process and using the right tools and products, you can achieve professional-level results. Remember, the work doesn’t stop after the correction. Proper post-correction care and maintenance are essential for preserving the impeccable finish and protection you’ve worked hard to achieve.
For expert paint correction in Orlando and maintenance services, look no further than Allyz Auto. Our skilled professionals are dedicated to providing top-tier vehicle protection. Ready to give your car a fresh, flawless look? Contact Allyz Auto today to schedule your paint correction service and keep your vehicle looking its best.